 Difficulty:
easy - medium
You will need:
- a 2.5mm crochet hook
- a smaller crochet hook to help attach the mane and tail (optional)
- dk yarn in black, dark brown and light brown
- toy stuffing
- a darning needle (or similar)
For the head and body (starting from the base):
Make a magic loop with 6sc
Round 1: 2sc in each st (12sc)
Round 2: sc in the first st, 2sc in the next st, rep to end (18sc)
Round 3: sc in the first 2 sts, 2sc in the next st, rep to end. ch1, turn (24sc)
Rounds 4 - 8: (5 rounds) sc in each st (24sc)
Round 9: sc in the first 2 sts, sc2tog, rep to end (18sc)
Round 10: sc in the first st, sc2tog, rep to end (12sc)
Round 11: sc in the first st, sc2tog, rep to end (8sc)
Rounds 12 - 13: (2 rounds) sc in each st (8sc)
Round 14: 2sc in each st (16sc)
Round 15: sc in each st
Round 16: sc in the first 3 sts, 2sc in the next st, rep to end (20sc)
Round 17: sc in each st
Round 18: sc in the first 4 sts, 2sc in the next st, rep to end (24sc)
Rounds 19 - 20: (2 rounds) sc in each st
Round 23: sc in the first 2 sts, sc2tog, rep to end (18sc)
Round 24: sc in the first st, sc2tog, rep to end (12sc)
Round 25: sc2tog to end (6sc)
Fasten off
For the arms (make 2):
Make a magic loop with 6sc
Round 1: sc in the first st, 2sc in the next st, rep to end (9sc)
Rounds 2 - 3: (2 rounds) sc in each st (9sc)
Round 4: sc in the first st, sc2tog, rep to end (6sc)
Rounds 5 - 9: (5 rounds) sc in each st (6sc)
Fasten off
For the legs (make 2):
Make a magic loop with 6sc
Round 1: 2sc in each st (12sc)
Round 2: sc in the first 3 sts, 2cs in the next st, rep to end (15sc)
Rounds 3 - 4: (2 rounds) sc in each st (15sc)
Round 5: sc2tog 3 times, sc in the last 9 sts (12sc)
Round 6: sc in the first 2 sts, sc2tog, rep to end (9sc)
Rounds 7 - 10: (4 rounds) sc in each st (9sc)
Fasten off
stuff the legs and sew then to the undetside of the body, then lightly stuff the hand section of the arms and sew them to the shoulders of the monkey
For the muzzle:
For the muzzle:
With light brown yarn ch4
Round 1: sc in 2nd ch4 from hook, slip the next chain st, 3sc in the end chain st, slip back of 2nd chain st, sc in back of first chain you croheted into (8sts)
Round 2: 2sc in the first st, slip the next st, 2sc in each of the following 3 sts, slip the next st, 2sc in each of the following 2sts (14sts)
Round 3: sc in the first st, 2sc in the next st, slip the next st, (sc in the first st, 2sc in the following stitch) x3 times, slip the next st, (sc in the first st, 2sc in the following st) twice (20sts)
Round 4: sc in the back loop of each st
Round 5: sc in each st
Fasten off
Sew the muzzle to the face, stuffing it as you sew. You may want to thread your yarn through the centre of the muzzle a few times after sewing it on to draw the two sides together and help shape it.
Round 5: sc in each st
Fasten off
Sew the muzzle to the face, stuffing it as you sew. You may want to thread your yarn through the centre of the muzzle a few times after sewing it on to draw the two sides together and help shape it.
For the ear (make 2):
With dark brown yarn make a magic loop with 6sc
Rounds 1-2: (2 rounds) sc in each st
Round 3: sc2tog, sc in the next st, sc2tog, sc in the last st (4sc)
Fasten off
Sew the ears to the top of the head, then use black yarn to embroider eyes to the face and details to the muzzle.

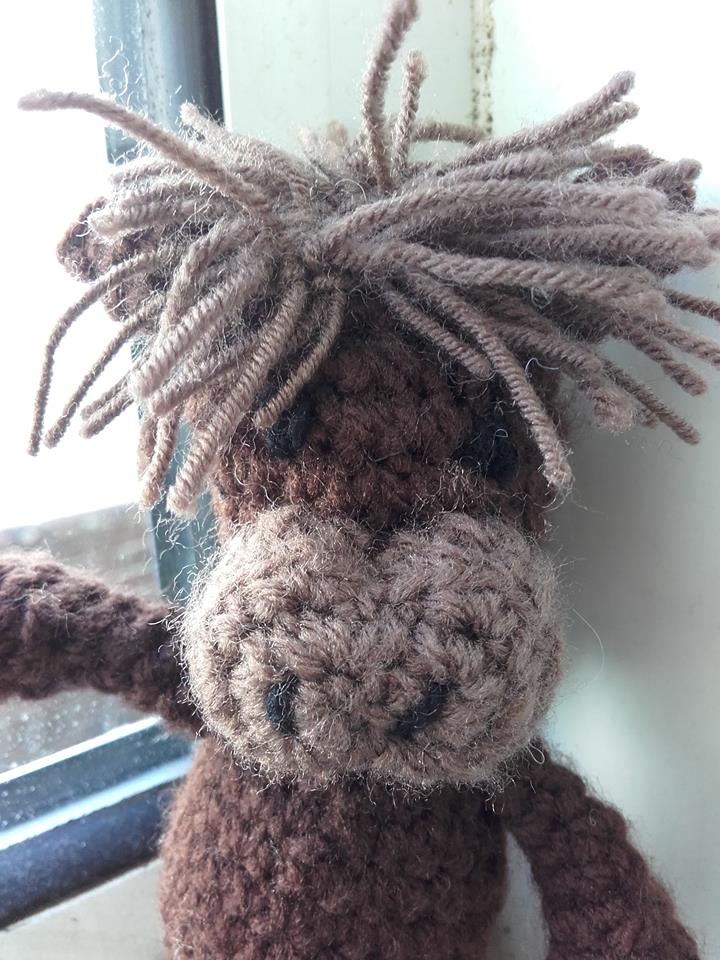
For the mane:
From the light brown yarn cut approximately 70 strips, each of roughly 8.5cm in length.
Attach these to the head and neck area of the horse by folding them in half and using a crochet hook to pull the folded end through your crochet, before threading the opposite end through the loop this makes. (If you are confused you can find some photots illustrating how to do this on my Little Hedgehog pattern.
For the tail:
From the light brown yarn cut approximately 20 strips, each of roughly 17cm in length.
Attach these to the lower back of the horse, trying to get them as close together as possible.


Fasten off
Sew the ears to the top of the head, then use black yarn to embroider eyes to the face and details to the muzzle.
For the mane:
From the light brown yarn cut approximately 70 strips, each of roughly 8.5cm in length.
Attach these to the head and neck area of the horse by folding them in half and using a crochet hook to pull the folded end through your crochet, before threading the opposite end through the loop this makes. (If you are confused you can find some photots illustrating how to do this on my Little Hedgehog pattern.
For the tail:
From the light brown yarn cut approximately 20 strips, each of roughly 17cm in length.
Attach these to the lower back of the horse, trying to get them as close together as possible.


If you wish your tail to look neat and even, trim it to the desired length.


I hope you have enjoyed this pattern; please feel free to contact me either below or on my ravelry page to tell me what you thought, along with any improvements you think could be made. Alternatively if you have any suggestions for future patterns you would like me to make I would love to hear from you.
You are welcome to sell any finished products you make but I do ask that you don't re-post this pattern or claim it as your own. Thank you!
No comments:
Post a Comment